Receive App Store & Google Play payouts with Revolut
Nikodem Bernat · Mar 20, 2025 · 5 min read
You wake up, open your RevenueCat dashboard, and to your surprise it looks like your app overnight went viral and now your in-app purchases are responsible for 10% of your country’s GDP 🤯
The next question is - how do I get all that money into my Revolut account? 💰
In this article I describe how to accept App Store and Google Play payouts to Revolut.
Introduction
Revolut is a neobank that provides various digital banking services through a mobile app. They also provide bank details for over 30 different currencies, so you can accept payments with ease. You may be tempted to use it to accept Google Play and Apple App Store payouts, but it’s not that straightforward.
Both Google Play Console and App Store Connect allow you to publish paid apps and free apps supported by microtransactions. The process to configure payouts for each store is different.
Keep in mind that I’m writing this article from a country in the European Union that has its own currency (Poland). If you are located in a different place, the exact steps may be different for you, but nonetheless, this article should give you some insights about the required steps (unless you are in the US, if that’s the case, then your law is probably completely different).
Also, don’t sue me if something goes wrong, I take no responsibility whatsoever.
App Store 🍎
I’ll assume that you want to receive your App Store payouts in 🇺🇸 Freedom Money 🦅 (USD) to save on exchange costs.
To do that, first, check the bank details for your Revolut account. Go to your USD account, click on “Details”, and you should see “Account details - US Dollar”. There is also information that those details should be used for cross-border transfers only. It looks something like that:
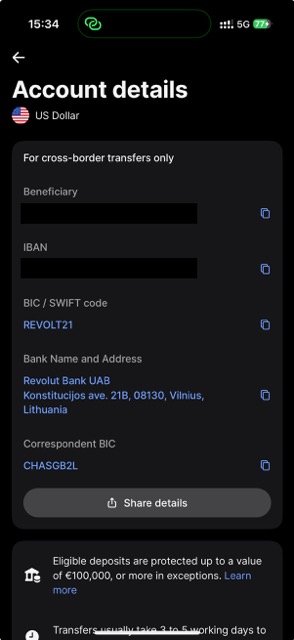
Copy all of those details, you will need them in a second.
Next, navigate to the “Business” section in App Store Connect, scroll to “Bank Accounts”, and click on a blue plus next to it.
You may have to fill “Paid Apps Agreement” and “Tax Forms” before adding your bank details if you haven’t done it yet.
Select “Lithuania” as a country (that’s the country where Revolut is registered as a bank), and “USD” as a currency. You should see a screen similar to that:
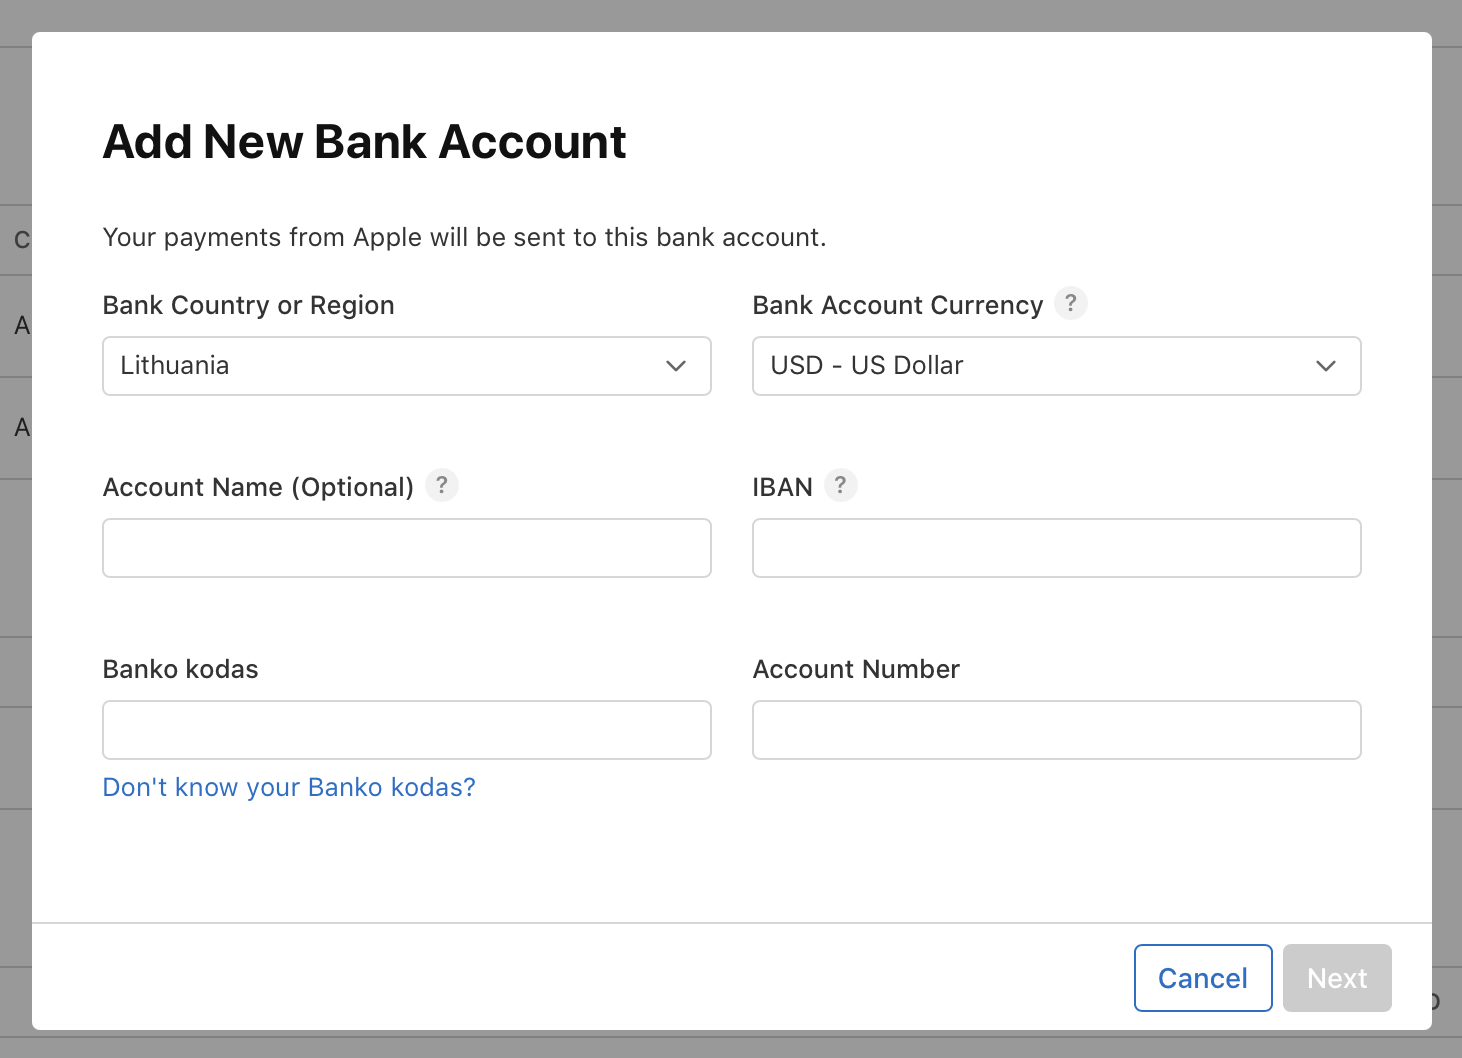
For “Account Name” you can just put “Revolut”, it doesn’t really matter. It’s just a label that makes it easier for you to distinguish between accounts.
“IBAN” is the long number that you copied in the previous step. It should look something like this: LT112222233333333333.
LTis a country code (Lithuania)11is a checksum (2 digits that that validate your IBAN)22222is “Banko kodas” (5 digits, you can verify it by clicking on “Don’t know your Banko kodas?“ and searching for Revolut. It’s probably one of the following values:32500,70700,70701)33333333333is your “Account Number”
In the next step you have to fill your name, and address.
After that, click “Next“, select a checkbox that says “I have read and agree to the terms and conditions above.”, and select “Add”.
Congratulations, that’s it! 🎉
One thing to keep in mind is that there may be some delays in payouts after changing the bank account. When I replaced my Wise account with a Revolut one ~3 days before the payout date, I still received that money in my Wise account. After that, I didn’t receive any money the next month (January), and two months later I received money for 2 months (January + February).
Google Play 🤖
When it comes to Google Play it’s a little bit more tricky, and it may not work for everyone. The good thing is that they verify your account, so if something is wrong, you will know.
Google requires your bank account to be located in your country and your currency. That’s a problem for a service like Revolut, because it’s not registered in my country as a bank, instead, they work with partners to provide me with banking services and local account details.
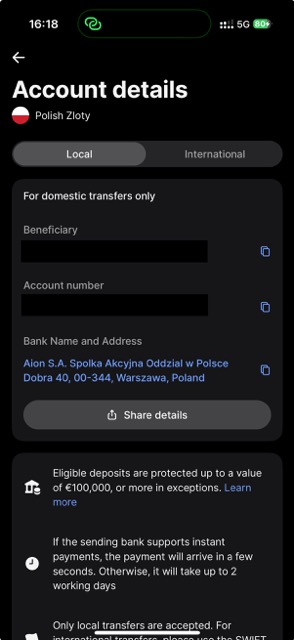
To work around this, go to your Revolut once again, but this time open local “Account details” for your country and currency (PLN in my case).
Next, go to: Google Play Console → Settings → Monetisation → Payments profile → Add payment method.
There, you can see a form that allows you to add a bank account. Something like this:
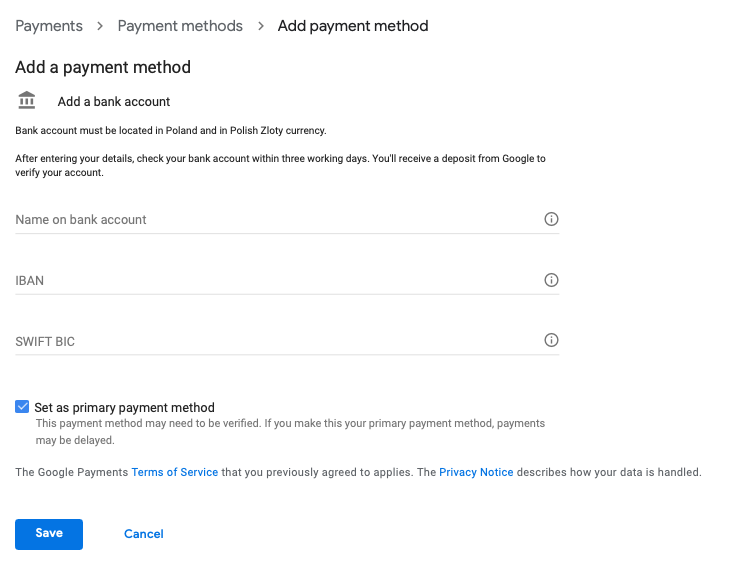
“Name on bank account” and “IBAN” are quite straightforward - just copy information from your Revolut app. Keep in mind that Google may require IBAN prefixed with a country code, so make sure it’s correct (in my case I had to add “PL“ manually).
“SWIFT BIC” is the tricky part. As you saw in the previous screenshot, Revolut’s partner in Poland is called Aion, so the next step is to do some digging and check what is the SWIFT number for this bank.
There is a website maintained by Wise that allows you to search for SWIFT/BIC codes. Go to https://wise.com/gb/swift-codes and on the right you should see a section called “Find a SWIFT code”.
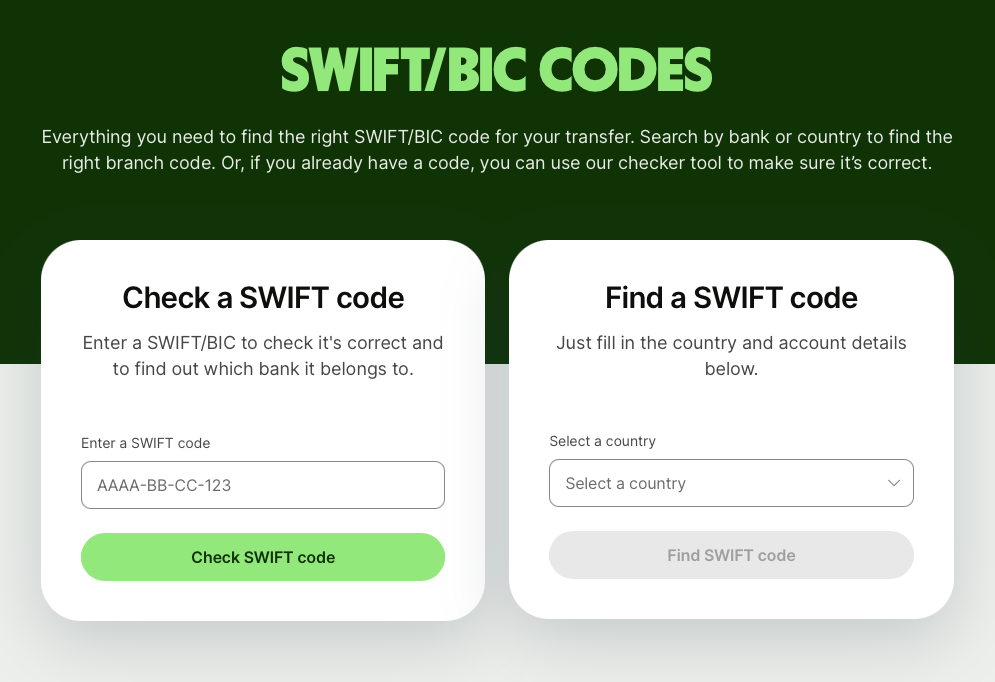
Select your country from that dropdown
Enter the name of the partner bank (Aion in my case)
If there is another text field for a city, you can probably leave it empty
Click “Find SWIFT code”
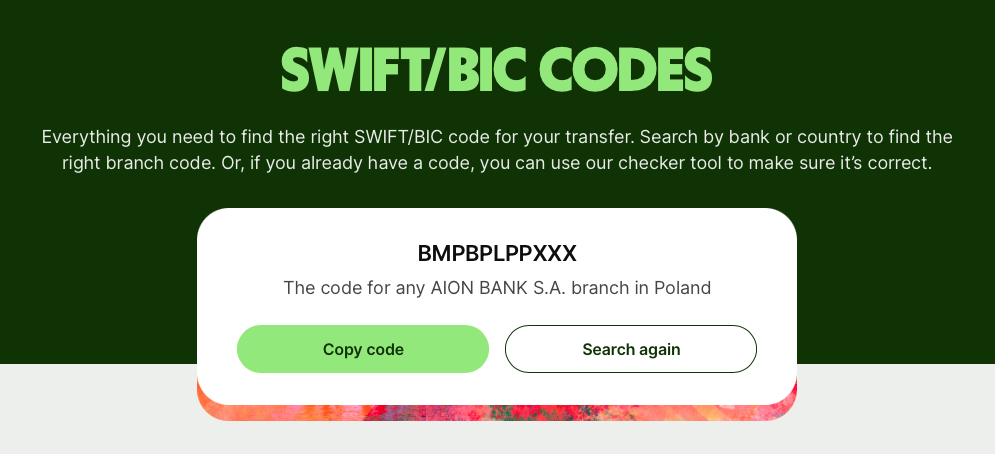
The search was successful, we can go back to Google Play Console and fill all remaining details and click “Save”.
As you can see, Google will deposit a small amount into your bank account to verify that it’s correct. They say it’s within 3 working days, but from my experience it’s more like 3-5 working days.
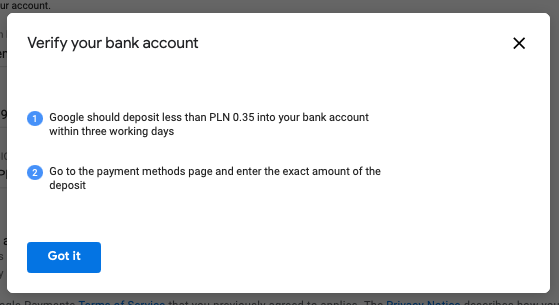
After you receive money from Google, go to “Payment methods” once again and click on “Verify”. You will then be prompted to select the exact amount that you have received, and if it’s correct then your bank account will be marked as verified.
Wrap 🌯 up ⬆️
As you can see, while Revolut is a great service, verifying your account can take some time.
If you enjoyed reading this article then feel free to follow me on X (Twitter) or check my other articles about Flutter.
You can also subscribe to my newsletter and get notified when I write more articles.
See you next time!